环境信息
机器配置
OS:CentOS Linux release 7.6 (Final)
Kernel:4.19.0-1.0.0.9
驱动: Driver Version: 535.216.03   CUDA Version: 12.2
GPU:NVIDIA  H20
vLLM:https://docs.vllm.ai/en/stable/
Docker:v1.5.4
nvidia-container-runtime:1.0.2-dev
vllm 测试镜像:vllm/vllm-openai:v0.8.2
sglang 测试镜像:lmsysorg/sglang:ea52b45be1a7
配置与模型根目录  /mnt/models
RDMA 网络配置:
[root@node01 models]# ibdev2netdev
mlx5_0 port 1 ==> xgbe0 (Up)
mlx5_1 port 1 ==> xgbe1 (Up)
mlx5_2 port 1 ==> xgbe2 (Up)
mlx5_3 port 1 ==> xgbe3 (Up)
mlx5_4 port 1 ==> xgbe4 (Up)
mlx5_5 port 1 ==> xgbe5 (Up)
mlx5_6 port 1 ==> xgbe6 (Up)
mlx5_7 port 1 ==> xgbe7 (Up)
mlx5_8 port 1 ==> xgbe8 (Up)
[root@node01 models]# show_gids
DEV     PORT    INDEX   GID                                     IPv4            VER     DEV
---     ----    -----   ---                                     ------------    ---     ---
mlx5_0  1       0       fe80:0000:0000:0000:bae9:24ff:fef9:56e0                 v1      xgbe0
mlx5_0  1       1       fe80:0000:0000:0000:bae9:24ff:fef9:56e0                 v2      xgbe0
mlx5_0  1       2       0000:0000:0000:0000:0000:ffff:0a3f:41cf 10.63.65.207    v1      xgbe0
mlx5_0  1       3       0000:0000:0000:0000:0000:ffff:0a3f:41cf 10.63.65.207    v2      xgbe0
mlx5_1  1       0       fe80:0000:0000:0000:a288:c2ff:fe59:b8f8                 v1      xgbe1
mlx5_1  1       1       fe80:0000:0000:0000:a288:c2ff:fe59:b8f8                 v2      xgbe1
mlx5_1  1       2       0000:0000:0000:0000:0000:ffff:2102:a00f 33.2.160.15     v1      xgbe1
mlx5_1  1       3       0000:0000:0000:0000:0000:ffff:2102:a00f 33.2.160.15     v2      xgbe1
mlx5_2  1       0       fe80:0000:0000:0000:a288:c2ff:fe59:f360                 v1      xgbe2
mlx5_2  1       1       fe80:0000:0000:0000:a288:c2ff:fe59:f360                 v2      xgbe2
mlx5_2  1       2       0000:0000:0000:0000:0000:ffff:2102:a08f 33.2.160.143    v1      xgbe2
mlx5_2  1       3       0000:0000:0000:0000:0000:ffff:2102:a08f 33.2.160.143    v2      xgbe2
mlx5_3  1       0       fe80:0000:0000:0000:a288:c2ff:fe59:a6a8                 v1      xgbe3
mlx5_3  1       1       fe80:0000:0000:0000:a288:c2ff:fe59:a6a8                 v2      xgbe3
mlx5_3  1       2       0000:0000:0000:0000:0000:ffff:2102:a10f 33.2.161.15     v1      xgbe3
mlx5_3  1       3       0000:0000:0000:0000:0000:ffff:2102:a10f 33.2.161.15     v2      xgbe3
mlx5_4  1       0       fe80:0000:0000:0000:a288:c2ff:fe59:bc70                 v1      xgbe4
mlx5_4  1       1       fe80:0000:0000:0000:a288:c2ff:fe59:bc70                 v2      xgbe4
mlx5_4  1       2       0000:0000:0000:0000:0000:ffff:2102:a18f 33.2.161.143    v1      xgbe4
mlx5_4  1       3       0000:0000:0000:0000:0000:ffff:2102:a18f 33.2.161.143    v2      xgbe4
mlx5_5  1       0       fe80:0000:0000:0000:a288:c2ff:fe59:b9a0                 v1      xgbe5
mlx5_5  1       1       fe80:0000:0000:0000:a288:c2ff:fe59:b9a0                 v2      xgbe5
mlx5_5  1       2       0000:0000:0000:0000:0000:ffff:2102:a20f 33.2.162.15     v1      xgbe5
mlx5_5  1       3       0000:0000:0000:0000:0000:ffff:2102:a20f 33.2.162.15     v2      xgbe5
mlx5_6  1       0       fe80:0000:0000:0000:a288:c2ff:fe59:baf8                 v1      xgbe6
mlx5_6  1       1       fe80:0000:0000:0000:a288:c2ff:fe59:baf8                 v2      xgbe6
mlx5_6  1       2       0000:0000:0000:0000:0000:ffff:2102:a28f 33.2.162.143    v1      xgbe6
mlx5_6  1       3       0000:0000:0000:0000:0000:ffff:2102:a28f 33.2.162.143    v2      xgbe6
mlx5_7  1       0       fe80:0000:0000:0000:a288:c2ff:fe59:f118                 v1      xgbe7
mlx5_7  1       1       fe80:0000:0000:0000:a288:c2ff:fe59:f118                 v2      xgbe7
mlx5_7  1       2       0000:0000:0000:0000:0000:ffff:2102:a30f 33.2.163.15     v1      xgbe7
mlx5_7  1       3       0000:0000:0000:0000:0000:ffff:2102:a30f 33.2.163.15     v2      xgbe7
mlx5_8  1       0       fe80:0000:0000:0000:a288:c2ff:fe59:c800                 v1      xgbe8
mlx5_8  1       1       fe80:0000:0000:0000:a288:c2ff:fe59:c800                 v2      xgbe8
mlx5_8  1       2       0000:0000:0000:0000:0000:ffff:2102:a38f 33.2.163.143    v1      xgbe8
mlx5_8  1       3       0000:0000:0000:0000:0000:ffff:2102:a38f 33.2.163.143    v2      xgbe8

[root@node02 models]# ibdev2netdev
mlx5_0 port 1 ==> xgbe0 (Up)
mlx5_1 port 1 ==> xgbe1 (Up)
mlx5_2 port 1 ==> xgbe2 (Up)
mlx5_3 port 1 ==> xgbe3 (Up)
mlx5_4 port 1 ==> xgbe4 (Up)
mlx5_5 port 1 ==> xgbe5 (Up)
mlx5_6 port 1 ==> xgbe6 (Up)
mlx5_7 port 1 ==> xgbe7 (Up)
mlx5_8 port 1 ==> xgbe8 (Up)
[root@node02 models]# show_gids
DEV     PORT    INDEX   GID                                     IPv4            VER     DEV
---     ----    -----   ---                                     ------------    ---     ---
mlx5_0  1       0       fe80:0000:0000:0000:e29d:73ff:fe25:effc                 v1      xgbe0
mlx5_0  1       1       fe80:0000:0000:0000:e29d:73ff:fe25:effc                 v2      xgbe0
mlx5_0  1       2       0000:0000:0000:0000:0000:ffff:0a3f:41d0 10.63.65.208    v1      xgbe0
mlx5_0  1       3       0000:0000:0000:0000:0000:ffff:0a3f:41d0 10.63.65.208    v2      xgbe0
mlx5_1  1       0       fe80:0000:0000:0000:a288:c2ff:fe59:d868                 v1      xgbe1
mlx5_1  1       1       fe80:0000:0000:0000:a288:c2ff:fe59:d868                 v2      xgbe1
mlx5_1  1       2       0000:0000:0000:0000:0000:ffff:2102:a010 33.2.160.16     v1      xgbe1
mlx5_1  1       3       0000:0000:0000:0000:0000:ffff:2102:a010 33.2.160.16     v2      xgbe1
mlx5_2  1       0       fe80:0000:0000:0000:a288:c2ff:fe59:f710                 v1      xgbe2
mlx5_2  1       1       fe80:0000:0000:0000:a288:c2ff:fe59:f710                 v2      xgbe2
mlx5_2  1       2       0000:0000:0000:0000:0000:ffff:2102:a090 33.2.160.144    v1      xgbe2
mlx5_2  1       3       0000:0000:0000:0000:0000:ffff:2102:a090 33.2.160.144    v2      xgbe2
mlx5_3  1       0       fe80:0000:0000:0000:a288:c2ff:fe59:ee30                 v1      xgbe3
mlx5_3  1       1       fe80:0000:0000:0000:a288:c2ff:fe59:ee30                 v2      xgbe3
mlx5_3  1       2       0000:0000:0000:0000:0000:ffff:2102:a110 33.2.161.16     v1      xgbe3
mlx5_3  1       3       0000:0000:0000:0000:0000:ffff:2102:a110 33.2.161.16     v2      xgbe3
mlx5_4  1       0       fe80:0000:0000:0000:a288:c2ff:fe59:c850                 v1      xgbe4
mlx5_4  1       1       fe80:0000:0000:0000:a288:c2ff:fe59:c850                 v2      xgbe4
mlx5_4  1       2       0000:0000:0000:0000:0000:ffff:2102:a190 33.2.161.144    v1      xgbe4
mlx5_4  1       3       0000:0000:0000:0000:0000:ffff:2102:a190 33.2.161.144    v2      xgbe4
mlx5_5  1       0       fe80:0000:0000:0000:a288:c2ff:fe59:ef38                 v1      xgbe5
mlx5_5  1       1       fe80:0000:0000:0000:a288:c2ff:fe59:ef38                 v2      xgbe5
mlx5_5  1       2       0000:0000:0000:0000:0000:ffff:2102:a210 33.2.162.16     v1      xgbe5
mlx5_5  1       3       0000:0000:0000:0000:0000:ffff:2102:a210 33.2.162.16     v2      xgbe5
mlx5_6  1       0       fe80:0000:0000:0000:a288:c2ff:fe59:c7e8                 v1      xgbe6
mlx5_6  1       1       fe80:0000:0000:0000:a288:c2ff:fe59:c7e8                 v2      xgbe6
mlx5_6  1       2       0000:0000:0000:0000:0000:ffff:2102:a290 33.2.162.144    v1      xgbe6
mlx5_6  1       3       0000:0000:0000:0000:0000:ffff:2102:a290 33.2.162.144    v2      xgbe6
mlx5_7  1       0       fe80:0000:0000:0000:a288:c2ff:fe59:b580                 v1      xgbe7
mlx5_7  1       1       fe80:0000:0000:0000:a288:c2ff:fe59:b580                 v2      xgbe7
mlx5_7  1       2       0000:0000:0000:0000:0000:ffff:2102:a310 33.2.163.16     v1      xgbe7
mlx5_7  1       3       0000:0000:0000:0000:0000:ffff:2102:a310 33.2.163.16     v2      xgbe7
mlx5_8  1       0       fe80:0000:0000:0000:a288:c2ff:fe59:b908                 v1      xgbe8
mlx5_8  1       1       fe80:0000:0000:0000:a288:c2ff:fe59:b908                 v2      xgbe8
mlx5_8  1       2       0000:0000:0000:0000:0000:ffff:2102:a390 33.2.163.144    v1      xgbe8
mlx5_8  1       3       0000:0000:0000:0000:0000:ffff:2102:a390 33.2.163.144    v2      xgbe8
⚠️ 注意:模型文件可能分为多个部分,一定要验证所有文件的完整性,避免因文件损坏导致的启动失败
下载权重
从 DeepSeek-R1 下载 DeepSeek-R1 FP8 模型文件;
vllm 双机测试
测试脚本
在主节点 head 机器启动前确保 8379 端口没有占用。
启动 ray 集群的脚本如下所示:
#!/bin/bash

# Check for minimum number of required arguments
if [ $# -lt 4 ]; then
    echo "Usage: $0 docker_image head_node_address --head|--worker path_to_hf_home [additional_args...]"
    exit 1
fi

# Assign the first three arguments and shift them away
DOCKER_IMAGE="$1"
HEAD_NODE_ADDRESS="$2"
NODE_TYPE="$3"  # Should be --head or --worker
PATH_TO_HF_HOME="$4"
NODE_NAME="$5"
shift 5

# Additional arguments are passed directly to the Docker command
ADDITIONAL_ARGS=("$@")

# Validate node type
if [ "${NODE_TYPE}" != "--head" ] && [ "${NODE_TYPE}" != "--worker" ]; then
    echo "Error: Node type must be --head or --worker"
    exit 1
fi

# Define a function to cleanup on EXIT signal
cleanup() {
    docker stop "${NODE_NAME}"
    docker rm "${NODE_NAME}"
}
trap cleanup EXIT

# Command setup for head or worker node
RAY_START_CMD="ray start --block"
if [ "${NODE_TYPE}" == "--head" ]; then
    RAY_START_CMD+=" --head --port=8379 --dashboard-host=0.0.0.0"
else
    RAY_START_CMD+=" --address=${HEAD_NODE_ADDRESS}:8379"
fi

# Run the docker command with the user specified parameters and additional arguments
docker run \
    --entrypoint /bin/bash \
    --privileged \
    --network host \
    --ipc host \
    --name "${NODE_NAME}" \
    --shm-size 128G \
    --gpus all \
    -v "${PATH_TO_HF_HOME}:/mnt/models" \
    "${ADDITIONAL_ARGS[@]}" \
    "${DOCKER_IMAGE}" -c "${RAY_START_CMD}"
在每个节点执行如下所示:
# 主节点 IP
export IP_OF_HEAD_NODE=10.63.65.207
export MODEL_PATH=/ssd1/models

export VLLM_HOST_IP=$(hostname -I | awk '{print $1}')
export HOST_IP=$(hostname -I | awk '{print $1}')

export GLOO_SOCKET_IFNAME=xgbe0
export TP_SOCKET_IFNAME=xgbe0
export NCCL_SOCKET_IFNAME=xgbe0
export NCCL_DEBUG=INFO
export NCCL_IB_HCA=mlx5_1:1,mlx5_2:1,mlx5_3:1,mlx5_4:1,mlx5_5:1,mlx5_6:1,mlx5_7:1,mlx5_8:1
# 以下配置也可
#export NCCL_IB_HCA=xgbe1,xgbe2,xgbe3,xgbe4,xgbe5,xgbe6,xgbe7,xgbe8
export NCCL_IB_GID_INDEX=3
export NCCL_IB_DISABLE=0
启动 head 节点
启动主节点 head:
nohup bash run_cluster.sh vllm/vllm-openai:v0.7.2 $IP_OF_HEAD_NODE --head $MODEL_PATH ray-node-head -e NCCL_SOCKET_IFNAME=$NCCL_SOCKET_IFNAME -e NCCL_DEBUG=$NCCL_DEBUG -e NCCL_IB_DISABLE=$NCCL_IB_DISABLE -e NCCL_IB_HCA=$NCCL_IB_HCA -e NCCL_IB_GID_INDEX=$NCCL_IB_GID_INDEX -e VLLM_HOST_IP=$VLLM_HOST_IP -e HOST_IP=$HOST_IP > nohup-head.log 2>&1 &
启动 worker 节点
启动从节点 worker:
nohup bash run_cluster.sh vllm/vllm-openai:v0.7.2 $IP_OF_HEAD_NODE --worker $MODEL_PATH ray-node-worker -e NCCL_SOCKET_IFNAME=$NCCL_SOCKET_IFNAME -e NCCL_DEBUG=$NCCL_DEBUG -e NCCL_IB_DISABLE=$NCCL_IB_DISABLE -e NCCL_IB_HCA=$NCCL_IB_HCA -e NCCL_IB_GID_INDEX=$NCCL_IB_GID_INDEX -e VLLM_HOST_IP=$VLLM_HOST_IP -e HOST_IP=$HOST_IP > nohup-worker.log 2>&1 &
启动 deepseek r1 模型
注:如果机器开启ipv6双栈网络,强烈建议配置该参数;
export VLLM_HOST_IP=$(hostname -I | awk '{print $1}')
export HOST_IP=$(hostname -I | awk '{print $1}')
python3 -m vllm.entrypoints.openai.api_server --model /mnt/models/DeepSeek-R1 --gpu-memory-utilization 0.90 --tensor-parallel-size 16 --host 0.0.0.0 --trust-remote-code --port 8000 --max_num_seqs 256 --max-num-batched-tokens 16384 --max_model_len 16384 --max_seq_len_to_capture 16384 --tokenizer-mode auto --enable-chunked-prefill=False --enable-reasoning --reasoning-parser deepseek_r1 --enforce-eager
参数说明:
- –model 模型路径,加载 /workspace/DeepSeek-R1 目录下的模型。
- –host 0.0.0.0监听所有网络接口的请求(允许外部访问)。
- –port 服务端口号设为 8000。
- –tokenizer-mode auto 自动选择分词器模式(优先使用 HuggingFace 的 auto 配置)。
- –gpu-memory-utilization 0.90 GPU 显存利用率上限设为 90%(避免 OOM)。如果高并发服务运行异常,建议调低此值。
- –tensor-parallel-size 16 使用 16 路张量并行(需 GPU 数量支持,适合超大模型)。
- –enforce-eager 强制启用 PyTorch 的 eager 模式(可能牺牲性能以提升兼容性)。
- –max_num_seqs 256 单次批处理的最大序列数(并发请求数上限)。vLLM 会动态调整,一般默认值设置为256。
- –max-num-batched-tokens 16384 批处理的最大总 token 数(影响吞吐量)。最大输入长度要小于这个数值。
- –max_model_len 16384 模型支持的最大上下文长度(16K tokens)。
- –max_seq_len_to_capture 16384 捕获的序列最大长度(用于优化 CUDA 内核)。框架默认超参,当前版本需要与 max_model_len 保持一致。
- –enable-chunked-prefill=False 禁用分块预填充(可能减少延迟但增加显存压力)。
- –enable-reasoning 启用推理模式(需配合 –reasoning-parser)。
- –reasoning-parser deepseek_r1 指定推理解析器为 deepseek_r1(自定义逻辑)。
- –trust-remote-code 允许加载远程代码(如自定义模型或分词器)。
如果 NET/IB 出现如下字段表示双机 RDMA 通信正常:
NET/TB: Using ..... OOB xgbe0:10.63.65.208<0>
如果出现如下文字,则表示 DeepSeek R1 启动成功:
Starting vLLM API server on http://0.0.0.0:8000
测试服务是否启动成功:
root@node01 curl http://localhost:8000/v1/models -H "Content-Type: application/json"

{"object":"list","data":[{"id":"/mnt/models/DeepSeek-R1","object":"model","created":1743226823,"owned_by":"vllm","root":"/mnt/models/DeepSeek-R1","parent":null,"max_model_len":16384,"permission":[{"id":"modelperm-84fad4c5fa5748aeaf39e39fbe56236e","object":"model_permission","created":1743226823,"allow_create_engine":false,"allow_sampling":true,"allow_logprobs":true,"allow_search_indices":false,"allow_view":true,"allow_fine_tuning":false,"organization":"*","group":null,"is_blocking":false}]}]}
参考
- https://docs.vllm.ai/en/latest/serving/distributed_serving.html
- https://github.com/vllm-project/vllm/blob/main/examples/online_serving/run_cluster.sh
- https://github.com/vllm-project/vllm/issues/1363
sglang 双机测试
配置环境
启动节点 node1:
docker run --gpus all \
    --network=host \
    --ipc=host \
    --security-opt=seccomp=unconfined \
    --cap-add=SYS_PTRACE \
    --ulimit=memlock=-1 --ulimit=nofile=120000 --ulimit=stack=67108864 \
    --shm-size=128G \
    --privileged \
    -v /ssd1/models:/mnt/models \
    --name sglang_node1 \
    -itd \
    lmsysorg/sglang:481f2edc18b5
启动节点 node2:
docker run --gpus all \
    --network=host \
    --ipc=host \
    --security-opt=seccomp=unconfined \
    --cap-add=SYS_PTRACE \
    --ulimit=memlock=-1 --ulimit=nofile=120000 --ulimit=stack=67108864 \
    --shm-size=128G \
    --privileged \
    -v /ssd1/models:/mnt/models \
    --name sglang_node2 \
    -itd \
    --ipc=host \
    lmsysorg/sglang:481f2edc18b5
构建 sglang 双机环境
在主节点 node1 服务启动前确保机器 30000 端口没有被占用。
在每个节点的容器里面执行以下操作:
# 主节点 IP
export IP_OF_HEAD_NODE=10.63.65.207
export SGLANG_HOST_IP=$(hostname -I | awk '{print $1}')
export HOST_IP=$(hostname -I | awk '{print $1}')

export GLOO_SOCKET_IFNAME=xgbe0
export TP_SOCKET_IFNAME=xgbe0
export NCCL_SOCKET_IFNAME=xgbe0
export NCCL_DEBUG=INFO
export NCCL_IB_HCA=mlx5_1:1,mlx5_2:1,mlx5_3:1,mlx5_4:1,mlx5_5:1,mlx5_6:1,mlx5_7:1,mlx5_8:1
# 以下配置也可以
#export NCCL_IB_HCA=xgbe1,xgbe2,xgbe3,xgbe4,xgbe5,xgbe6,xgbe7,xgbe8
export NCCL_IB_GID_INDEX=3
export NCCL_IB_DISABLE=0
注:如果机器开启ipv6双栈网络,并且 ipv6 网络不通,强烈建议配置该参数;
export SGLANG_HOST_IP=$(hostname -I | awk '{print $1}')
export HOST_IP=$(hostname -I | awk '{print $1}')
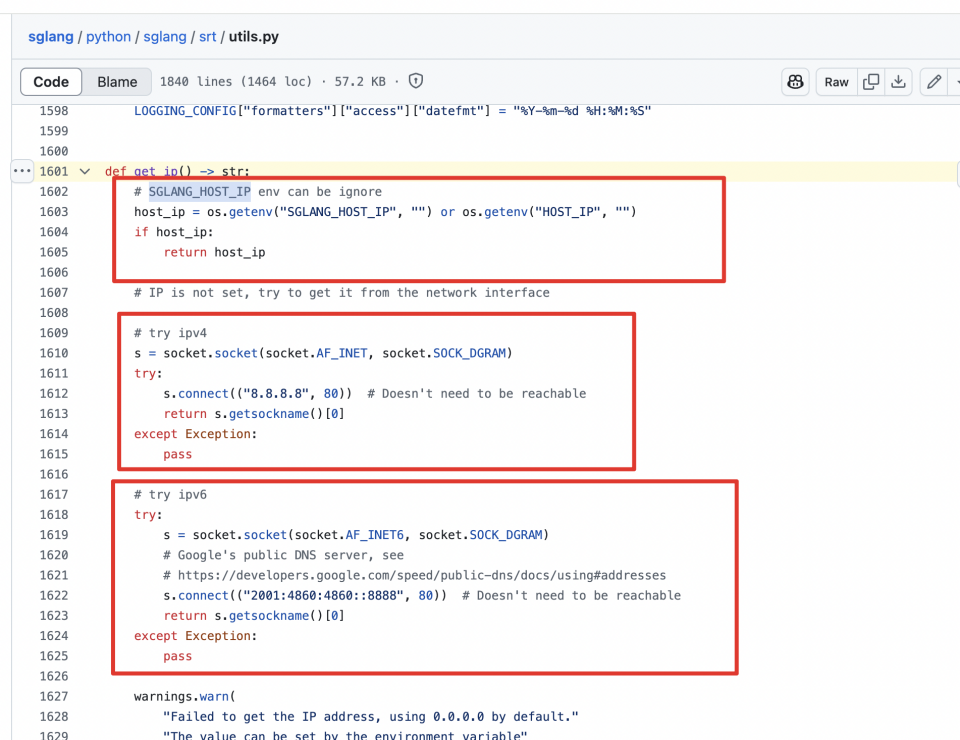
这个地方非常非常非常非常有点坑,详见代码 https://github.com/sgl-project/sglang/blob/main/python/sglang/srt/utils.py#L1601。
docker exec -it sglang_node1 bash

# 节点1
python3 -m sglang.launch_server \
    --model-path /mnt/models/DeepSeek-R1 \
    --dist-init-addr $IP_OF_HEAD_NODE:30000 \
    --nnodes 2 \
    --node-rank 0 \
    --tp 16 \
    --trust-remote-code \
    --mem-fraction-static 0.90 \
    --tokenizer-mode auto \
    --chunked-prefill-size  4096 \
    --context-length  65536 \
    --quantization fp8  \
    --reasoning-parser deepseek-r1 \
    --host 0.0.0.0 \
    --port 8000

docker exec -it sglang_node2 bash

# 节点2
python3 -m sglang.launch_server \
    --model-path /mnt/models/DeepSeek-R1 \
    --dist-init-addr $IP_OF_HEAD_NODE:30000 \
    --nnodes 2 \
    --node-rank 1 \
    --tp 16 \
    --trust-remote-code \
    --mem-fraction-static 0.90 \
    --tokenizer-mode auto \
    --chunked-prefill-size  4096 \
    --context-length  65536 \
    --quantization fp8  \
    --reasoning-parser deepseek-r1 \
    --host 0.0.0.0 \
    --port 8000
参数说明
- –model-path 模型路径,加载 /mnt/models/DeepSeek-R1 目录下的模型。
- –host 0.0.0.0监听所有网络接口的请求(允许外部访问)。
- –port 服务端口号设为 8000。
- –tokenizer-mode auto 自动选择分词器模式(优先使用 HuggingFace 的 auto 配置)。
- –tp 16 使用 16 路张量并行(需 GPU 数量支持,适合超大模型)。
- –reasoning-parser deepseek-r1 指定推理解析器为 deepseek-r1(自定义逻辑)。
- –trust-remote-code 允许加载远程代码(如自定义模型或分词器)。
启动 deepseek r1 模型
docker exec -it sglang_node1 bash

# 节点1
python3 -m sglang.launch_server \
    --model-path /mnt/models/DeepSeek-R1 \
    --dist-init-addr $IP_OF_HEAD_NODE:30000 \
    --nnodes 2 \
    --node-rank 0 \
    --tp 16 \
    --trust-remote-code \
    --mem-fraction-static 0.90 \
    --tokenizer-mode auto \
    --chunked-prefill-size  4096 \
    --context-length  65536 \
    --quantization fp8  \
    --reasoning-parser deepseek-r1 \
    --host 0.0.0.0 \
    --port 8000

docker exec -it sglang_node2 bash

# 节点2
python3 -m sglang.launch_server \
    --model-path /mnt/models/DeepSeek-R1 \
    --dist-init-addr $IP_OF_HEAD_NODE:30000 \
    --nnodes 2 \
    --node-rank 1 \
    --tp 16 \
    --trust-remote-code \
    --mem-fraction-static 0.90 \
    --tokenizer-mode auto \
    --chunked-prefill-size  4096 \
    --context-length  65536 \
    --quantization fp8  \
    --reasoning-parser deepseek-r1 \
    --host 0.0.0.0 \
    --port 8000
如果 NET/IB 出现如下字段表示双机 RDMA 通信正常:
NET/TB: Using ..... OOB xgbe0:10.63.65.208
如果出现如下文字,则表示 DeepSeek R1 启动成功:
The server is fired up and ready to roll!
测试服务是否启动成功:
root@node01 curl http://localhost:8000/v1/models -H "Content-Type: application/json"

{"object":"list","data":[{"id":"/mnt/models/DeepSeek-R1","object":"model","created":1743226823,"owned_by":"vllm","root":"/mnt/models/DeepSeek-R1","parent":null,"max_model_len":16384,"permission":[{"id":"modelperm-84fad4c5fa5748aeaf39e39fbe56236e","object":"model_permission","created":1743226823,"allow_create_engine":false,"allow_sampling":true,"allow_logprobs":true,"allow_search_indices":false,"allow_view":true,"allow_fine_tuning":false,"organization":"*","group":null,"is_blocking":false}]}]}
- 性能优化选项:默认已启用 MLA(内存布局优化)加速。以下为可选优化项,可按需开启:
- 数据并行注意力(Data Parallelism Attention):适用于高 QPS(每秒查询量)场景,添加
--enable-dp-attention参数可显著提升吞吐量。 - Torch.compile 优化:添加
--enable-torch-compile参数以启用。服务启动时将消耗额外时间进行编译。可通过--torch-compile-max-bs控制优化后的最大批处理大小,建议设为 1 至 8 之间(例如:--torch-compile-max-bs 8)。
开启 --enable-torch-compile --torch-compile-max-bs 8 参数后启动耗时比较长,大约需要 20 多分钟;
参考
构建 sglang 双机环境(默认参数)
构建环境
在主节点 node1 服务启动前确保机器 30000 端口没有被占用
启动节点 node1:
docker run --gpus all \
    --network=host \
    --ipc=host \
    --security-opt=seccomp=unconfined \
    --cap-add=SYS_PTRACE \
    --ulimit=memlock=-1 --ulimit=nofile=120000 --ulimit=stack=67108864 \
    --shm-size=128G \
    --privileged \
    -v /ssd1/models:/mnt/models \
    --name sglang_node1 \
    -itd \
    lmsysorg/sglang:ea52b45be1a7
启动节点 node2:
docker run --gpus all \
    --network=host \
    --ipc=host \
    --security-opt=seccomp=unconfined \
    --cap-add=SYS_PTRACE \
    --ulimit=memlock=-1 --ulimit=nofile=120000 --ulimit=stack=67108864 \
    --shm-size=128G \
    --privileged \
    -v /ssd1/models:/mnt/models \
    --name sglang_node2 \
    -itd \
    --ipc=host \
    lmsysorg/sglang:ea52b45be1a7
启动 deepseek r1 服务,在每个节点的容器里面执行以下操作:
# 主节点 IP
export IP_OF_HEAD_NODE=10.63.65.207
export SGLANG_HOST_IP=$(hostname -I | awk '{print $1}')
export HOST_IP=$(hostname -I | awk '{print $1}')

export GLOO_SOCKET_IFNAME=xgbe0
export TP_SOCKET_IFNAME=xgbe0
export NCCL_SOCKET_IFNAME=xgbe0
export NCCL_DEBUG=INFO
export NCCL_IB_HCA=xgbe1,xgbe2,xgbe3,xgbe4,xgbe5,xgbe6,xgbe7,xgbe8
export NCCL_IB_GID_INDEX=3
export NCCL_IB_DISABLE=0
docker exec -it sglang_node1 bash

python3 -m sglang.launch_server --model-path /mnt/models/DeepSeek-R1 --tp 16 --dist-init-addr $IP_OF_HEAD_NODE:30000 --nnodes 2 --node-rank 0 --trust-remote-code --host 0.0.0.0 --port 8000

docker exec -it sglang_node2 bash

python3 -m sglang.launch_server --model-path /mnt/models/DeepSeek-R1 --tp 16 --dist-init-addr $IP_OF_HEAD_NODE:30000 --nnodes 2 --node-rank 1 --trust-remote-code --host 0.0.0.0 --port 8000
如果启动成功,则出现如下日志:
The server is fired up and ready to roll!
性能测试
测试脚本:
#!/bin/bash

output_dir=$1

declare -A test_cases=(
    # 格式: "输入长度 输出长度 numprt"="描述"
    ["128 128 1"]="128"
    ["128 128 2"]="128"
    ["128 128 4"]="128"
    ["128 128 8"]="128"
    ["128 128 16"]="128"
    ["128 128 32"]="128"
    ["128 128 64"]="128"
    ["128 128 128"]="128"
    ["128 128 256"]="128"
    ["128 128 512"]="128"
    ["128 128 1024"]="128"

    ["256 256 1"]="256"
    ["256 256 2"]="256"
    ["256 256 4"]="256"
    ["256 256 8"]="256"
    ["256 256 16"]="256"
    ["256 256 32"]="256"
    ["256 256 64"]="256"
    ["256 256 128"]="256"
    ["256 256 256"]="256"
    ["256 256 512"]="256"
    ["256 256 1024"]="256"
)

random_range_ratios=(1.0)

# 循环遍历所有测试用例
for case in "${!test_cases[@]}"; do
    # 分割输入长度、输出长度和numprt
    IFS=' ' read inlen outlen numprt <<< "${case}"

    # 构建日志文件名和结果文件名
    result_file="${output_dir}/serving_benchmark_${numprt}_${inlen}_${outlen}.json"

     for ratio in "${random_range_ratios[@]}"
        do
            python3 -m sglang.bench_serving \
                --backend sglang \
                --dataset-name random \
                --dataset-path /mnt/models/sglang-perf/datasets/ShareGPT_V3_unfiltered_cleaned_split.json \
                --model /mnt/models/DeepSeek-R1 \
                --random-input ${inlen} \
                --random-output ${outlen} \
                --random-range-ratio ${ratio} \
                --num-prompts ${numprt} \
                --host 0.0.0.0 \
                --port 8000 \
                --output-file "$result_file" \
                --max-concurrency ${numprt}
        done
        echo "Executed command for num-prompts=$numprt, inlen=$input_len, outlen=$output_len. Output saved to $result_file"

done
收集测试结果脚本:
import json
import os
import csv
import re
import argparse

#fieldnames = ["tp", "concurrency", "mean TTFT(ms)", "p90_tpot_ms",
#              "output_throughput(tokens/s)", "total_throughput(tokens/s)",
#              "mean TPOT(ms)", "mean e2e(ms)", "mean_input_len", "mean_output_len"]

fieldnames = ["concurrency", "mean TTFT(ms)", "input_throughput(tokens/s)",
              "output_throughput(tokens/s)", "mean TPOT(ms)", "mean_input_len",
              "mean_output_len"]


def main(args):
    data = []

    for _, _, files in os.walk(args.dir):
        for file in files:
            if file.endswith(".json"):
                # tp${TENSOR_PARALLEL}_CON${i}_in${INPUT_LENGTH}_out${OUTPUT_LENGTH}.json
                # pattern = r'tp(\d+)_CON(\d+)_in(\d+)_out(\d+)\.json'
                pattern = r'serving_benchmark_(\d+)_(\d+)_(\d+).json'
                # 使用正则表达式匹配文件名
                match = re.match(pattern, file)
                if match:
                    # tp = int(match.group(1))
                    # con = int(match.group(2))
                    # input_length = int(match.group(3))
                    # output_length = int(match.group(4))
                    con = int(match.group(1))
                    input_length = int(match.group(2))
                    output_length = int(match.group(3))
                else:
                    print("not match")

                with open(os.path.join(args.dir, file), 'r') as f:
                    result = json.load(f)
                    data.append(
                        {
                            # "tp": tp,
                            "concurrency": con,
                            "mean TTFT(ms)": result['mean_ttft_ms'],
                            # "p90_tpot_ms": result["p90_tpot_ms"],
                            "input_throughput(tokens/s)": result["input_throughput"],
                            "output_throughput(tokens/s)": result['output_throughput'],
                            # "total_throughput(tokens/s)": result["total_token_throughput"],
                            "mean TPOT(ms)": result['mean_tpot_ms'],
                            # "mean e2e(ms)": result['mean_e2el_ms'],
                            "mean_input_len": sum(result['input_lens']) / len(result['input_lens']),
                            "mean_output_len": sum(result['output_lens']) / len(result['output_lens'])
                        }
                    )

    with open(os.path.join(args.dir, 'summary.csv'), 'w') as f:
        writer = csv.DictWriter(f, fieldnames=fieldnames)
        writer.writeheader()
        writer.writerows(data)

if __name__ == "__main__":
    parser = argparse.ArgumentParser()
    parser.add_argument("--dir", type=str, help="")

    args = parser.parse_args()
    main(args)
测试结果
| Concurrency | Mean TTFT (ms) | Input Throughput (tokens/s) | Output Throughput (tokens/s) | Mean TPOT (ms) | Mean Input Len | Mean Output Len |
|---|---|---|---|---|---|---|
| 1 | 316.52 | 17.20 | 17.20 | 57.14 | 256 | 256 |
| 1 | 285.84 | 17.42 | 17.42 | 55.60 | 128 | 128 |
| 2 | 1126.91 | 31.78 | 31.78 | 58.76 | 256 | 256 |
| 2 | 321.56 | 33.03 | 33.03 | 58.49 | 128 | 128 |
| 4 | 342.96 | 59.24 | 59.24 | 66.44 | 256 | 256 |
| 4 | 454.82 | 59.35 | 59.35 | 64.34 | 128 | 128 |
| 8 | 631.93 | 89.40 | 89.40 | 85.20 | 128 | 128 |
| 8 | 1349.76 | 91.14 | 91.14 | 82.82 | 256 | 256 |
| 16 | 681.99 | 137.47 | 137.47 | 114.16 | 256 | 256 |
| 16 | 608.29 | 136.20 | 136.20 | 113.59 | 128 | 128 |
| 32 | 501.92 | 219.70 | 219.70 | 144.24 | 256 | 256 |
| 32 | 838.25 | 198.94 | 198.94 | 155.46 | 128 | 128 |
| 64 | 1062.61 | 290.74 | 290.74 | 213.41 | 128 | 128 |
| 64 | 1046.21 | 291.33 | 291.33 | 216.41 | 256 | 256 |
| 100 | 1008.45 | 413.92 | 413.92 | 238.54 | 256 | 256 |
| 100 | 1441.36 | 435.11 | 435.11 | 220.18 | 128 | 128 |
| 128 | 1263.11 | 506.19 | 506.19 | 244.77 | 128 | 128 |
| 128 | 1205.51 | 505.17 | 505.17 | 249.58 | 256 | 256 |
| 200 | 2316.10 | 357.58 | 357.58 | 552.32 | 256 | 256 |
| 200 | 1395.16 | 436.23 | 436.23 | 450.87 | 128 | 128 |
| 256 | 1695.48 | 378.55 | 378.55 | 672.14 | 256 | 256 |
| 256 | 1991.52 | 375.48 | 375.48 | 671.24 | 128 | 128 |
| 512 | 4446.39 | 459.66 | 459.66 | 1100.49 | 256 | 256 |
| 512 | 3023.79 | 436.38 | 436.38 | 1158.17 | 128 | 128 |
| 1024 | 3088.61 | 1092.91 | 1092.91 | 918.67 | 128 | 128 |
| 1024 | 2798.73 | 1090.29 | 1090.29 | 931.18 | 256 | 256 |
参考
总结
- 与 vllm 单机相比,vllm 双机性能存在下降,推测双机通信存在瓶颈,双机之间的通讯开销较大。
- 与 sglang 单机相比,sglang 双机性能存在下降,推测双机通信存在瓶颈,双机之间的通讯开销较大。